How to fix a leaking tap
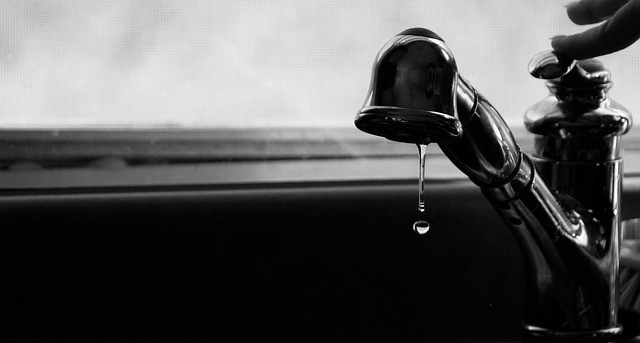
If you have (or have had) a leaking tap in your home or workplace, you will know how annoying and frustrating it can be. Besides the fact that there is a wastage of water, and therefore a higher water bill, they can be a real nuisance to your entire household or office and be noisy and messy.

So, what we really want to say is, stop putting off fixing that leaking tap and just get it done. Whether you call a professional to get it fixed, or you decide that the DIY option is more your style, either way, that leaking tap needs to become a thing of the past. We, therefore, thought we'd put together a little step-by-step on how to fix a leaking tap if DIY is something you enjoy and you need a new project for your Sunday afternoon. Alternatively, give the team at Everyday Plumbing a call on 0488 801 008 and they can give you a hand. Remember, if you are in doubt, always call a plumber to help you. They are knowledgeable and skilled in fixing all sorts of taps, and will have the correct equipment and tools to get the job done correctly.
One leaking tap can waste up to 2,000 litres of water a month.
Common causes of leaking taps
To start off, we thought we'd fill you in on a few major causes of leaking taps - this list isn't exhaustive, but more often than not the below are the culprits when it comes to a leaky faucet:
- You have an incorrectly sized washer in your tap
- You have a worn-out jumper valve
- Your tap washer is broken or worn out
- Your tap O-ring is loose or worn out
- Your tap valve seating has corroded or is broken
- Your tap has had its washer incorrectly installed in the past

Tap parts
When looking at fixing your tap, it is worthwhile knowing if your tap is equipped with ceramic or rubber parts (or something else, but these two are the main ones) when looking at the way in which the water flow is stopped when you turn your tap off. To figure this out, it is super easy:
- If your tap turns 1/4 to a 1/2 when you turn it on, you likely have a tap sealant that is made of ceramic.
- If your tap turns further than 1/2 when you turn it on, you likely have a rubber washer tap sealant.
Types of taps
There are two main types of leaking taps that generally occur in your home or workplace - one to do with your tap O-ring, and one related to your tap washer. If you turn your tap off and the water continues to drip out, it is likely your tap washer that is causing the leak. Alternatively, if your water leak is occurring from the tap body or spindle, you are likely looking at an O-ring issue.
The most common kind of leaking tap is caused by a broken washer, which is relatively easy to fix (if you know how) and quite inexpensive. If you do not know what you are doing, however, DIY jobs can become messy and expensive very quickly. If you are ever in doubt, give your local plumber a call and they will be able to assist.
How to fix a dripping tap
If you are still reading, you are likely ready to start your leaking-tap-fixing, so let's get to it.
Tools and supplies you will need
The first thing to do is to ensure you have the correct tools and supplies to complete the job:
- Correct sized washers
- Jumper valves
- An O-ring
- Pliers
- Tweezers
- Screwdriver
- Shifting wrench (or set of spanners)
- A cloth
- Gaffer tape
- Sealants, such as silicone, or a resealing kit (your need for this will depend on the type of tap you are fixing)
Preparation
After you have ensured you have all the correct tools and supplies, the next thing you have to do is prepare your leaking tap. Do not skip this step! This is a super important step and, if you choose to skip it, you will likely have a giant mess everywhere.
You must first turn off your water supply at the main (check the front yard of your home or your bathroom/laundry in your apartment) and then turn on your leaking tap and let it run all the excess water out.
Sneaky Tip - If you are worried that there is still water left in the pipes, turn on a tap at a lower level (for example, your garden or garage) and any residue should flow out.

Let's fix your tap!
So, you've managed to collect your tools and supplies and prepped your leaking tap. It's now time to get fixing.
Plug the sink
Step one is to always plug your sink before starting. The reason you need to place a plug in your drain is simple - so you don't lose anything down it. There are small parts when you take apart your tap, therefore it is very easy to lose parts down the sink. Putting a plug in the sink stops any parts from getting lost.
Remove the tap button
After you have placed a plug in the sink, you will need to remove the tap button. The tap button is what says 'hot' or 'cold', and is likely located on the top of your tap. Removing this can be tough, so grab a screwdriver if you need a little extra help.
Remove the tap handle
Next, you need to remove the tap handle, so you are closer to getting to the inside of your tap. How this is done will depend on the type of tap you have, but it will likely need to be unscrewed with a spanner or wrench.
Remove the tap skirt or shroud
Following the removal of the tap handle, you will need to remove the tap skirt or shroud (if your tap has one). This is likely made of metal and may be tricky to remove due to any sealant that is present, so grab a pair of pliers or a wrench to assist. If you are worried about scratching your tap, wrap some gaffer tap around it and then a cloth - this should protect the metal from any tools.
Remove the tap body
Now it's time to remove the tap body, which should allow you access to the washer and jumper valve (the main goal!). You will likely need a spanner to help you remove it and make sure you put it in a safe place - you don't want to lose it.
Remove the tap washer and jumper valve
Once all the above parts have been removed, you will hopefully be able to see the tap washer and jumper valve. If you can't see the jumper valve, don't worry - check out the tap body (as it may have gotten stuck in there). As long as you know where it is, that's the main thing.
Whether you can only see the washer or both the washer and jumper valve, they need to be removed - use tweezers or needle-nose pliers, it makes things much easier.
Replace the washer
Take the tap washer and jumper valve you removed in the previous step and head to your local hardware store to replace any broken or worn-out parts. If you are unsure, have a chat with the staff and they should be able to assist. For reference, washers that are found in your home taps are generally 12mm but can be up to 15mm or more in some instances. Also, before you leave, ensure you pick up some sealant to stop future mould buildup if necessary.
Reassemble the tap
Once you have purchased the relevant new parts, place the tap washer and jumper valve back into your tap and put the rest of the pieces back together. Always ensure the washer and jumper valve is in the right spot before you put any other components together, and always follow the washer and jumper valve with the tap body and use a spanner or wrench to tighten it. Make sure you skip the sealant on this step - we need to test the tap before sealing everything back up.
Turn on the water supply
After your tap has been put back together, turn the water supply back on (but ensure your tap is turned off - not too tight though!).
Test your tap
Now it's time to test your tap. Turn it on and see if it is still leaking. If it isn't take the skirt and handle off and place some sealant on the skirt base. If it is still leaking, give your local plumber a call as there may be a bigger problem going on... And be careful of the sealant, it can get very messy.
Your leaking tap professionals across Sydney
If you have any questions regarding the plumbing services that Everyday Plumbing provides, or would like to arrange for one of our qualified technicians to attend your home or workplace, give us a call on 0488 801 008 or complete an online job booking form now.
Resources:
Australian Government - Department of the Environment and Energy (Water Efficiency):https://www.energy.gov.au/households/water-efficiency
Queensland Government (Saving Water at Home):https://www.qld.gov.au/environment/water/residence/use/home/leaks